LinkBanner Tutorial for Partners
LinkBanner is a new product offering that gives Partners another way to monetize their website. We have many other forms of ads and the graphical is one we get many requests for and finally offer it. As a partner, you'll be able to sell banner ads on your website through the LinkWorth system, along with all of our other products. Give advertisers a way to brand themselves, gain traffic and improve their linking campaigns.
To help get the process going, we put together a simple tutorial to guide you through all of the steps to get going.
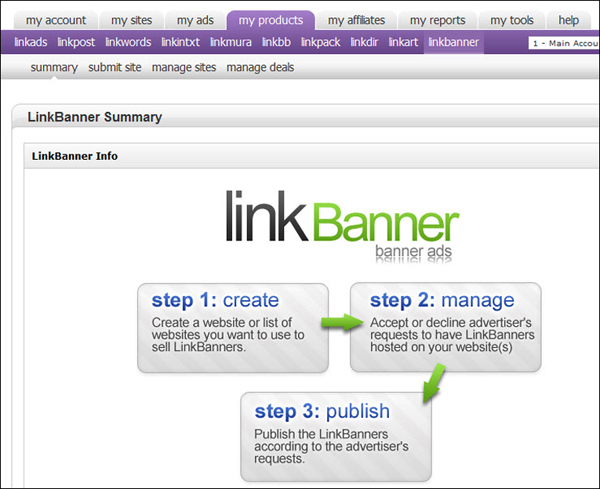
1. Navigate to the LinkBanner Summary page for a brief description and navigation:
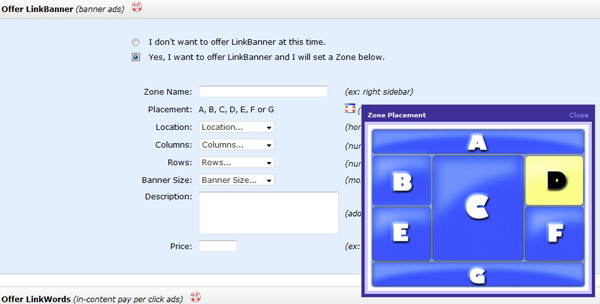
2. If you have not submitted any websites with us, select the SUBMIT SITE menu option. You will need to enter all of the details involved with submitting a new listing. When it comes to the LinkBanner section, you'll need to label a zone name that describes where the banners will appear; for the zone placement, mouseover the small icon to see an illustration of each zone, it will help illustrate to the Advertisers where you plan on publishing their banner for each zone; pick how many columns of banners will exist in the zone; pick how many rows of banners will exist in this zone; the banner size that will appear in this zone; use the description to give additional details that describes your zone; finally, select a price you wish to charge per banner in this zone. Once the site is submitted and approved, you can edit your listing and add additional zones, if you wish to offer banner ads in other locations of your site.
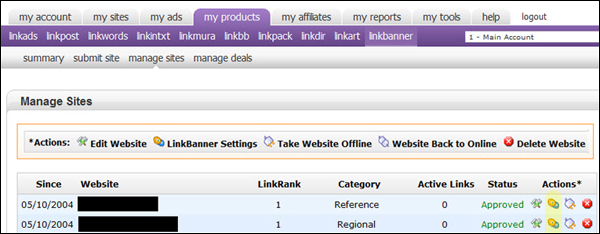
3. If you have already submitted your website and want to add LinkBanner zones, or, you want to add additional zones to your site, select the MANAGE SITES menu option. You'll see a listing of all websites submitted. Under the 'Actions' column on the far right, look for the LINKBANNER SETTINGS icon (orange color icon). Click this icon to open the settings page for that website listing.
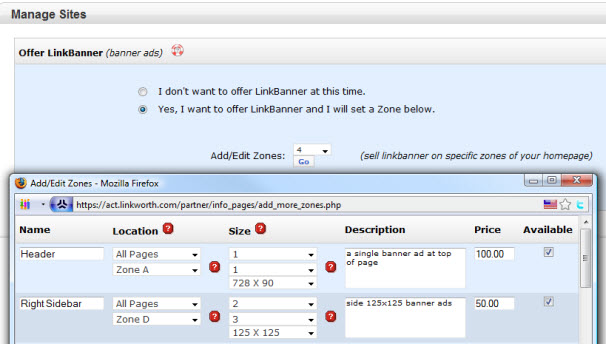
4. Once clicked, you'll see the illustration below. Choose the number of Zones you want to offer on your site and click GO. The add/edit Zones window will open and you can begin entering zones. If you are offering more than 4 zones, complete the 4 that are showing and submit. Once you do this, two new rows will appear if you wish to offer more.
When completing the zones, shown below, be sure to fill in all of the fields and make sure the 'Available' checkbox is selected. If you sell out of a particular zone, you can edit the settings and uncheck the 'Available' checkbox and it will take that zone offline. Submit your changes when finished.
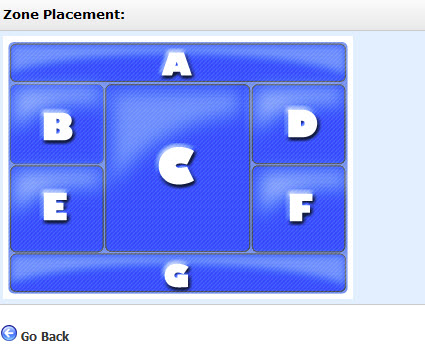
If you would like to get help on the Zone Location, click on the red question mark icon next to the label and it will show you an illustration of your zone options.
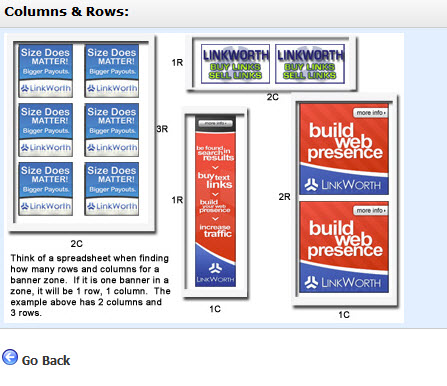
If you would like to get help on the 'size', including what 'columns' and 'rows' mean, click on the red question mark icon next to the label and it will show you an illustration to help explain what this means.
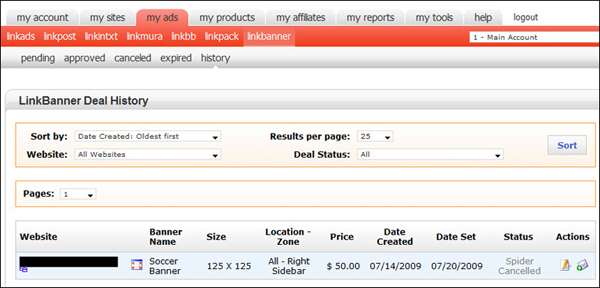
5. After you have LinkBanner deals either approved, pending, expired or canceled, you'll be able to see them by clicking the MANAGE DEALS menu option:

which will direct you to MY ADS > LINKBANNER > as shown below. You'll have all of the different status types which can be viewed by selecting the menu option of your choice. If you are unable to locate a specific deal in one of the first 4 menu options, look in the history tab which will show all deals. On this page you can view the LinkBanner deals, along with details of each and Actions you can perform from each page.
